For detailed steps and configurations, follow along with the full video here.
Overview
This explains how to set up and use Amazon FSx for Windows in a networked environment. It covers the key steps involved, including configuration and access from on-premises computers.
Architecture
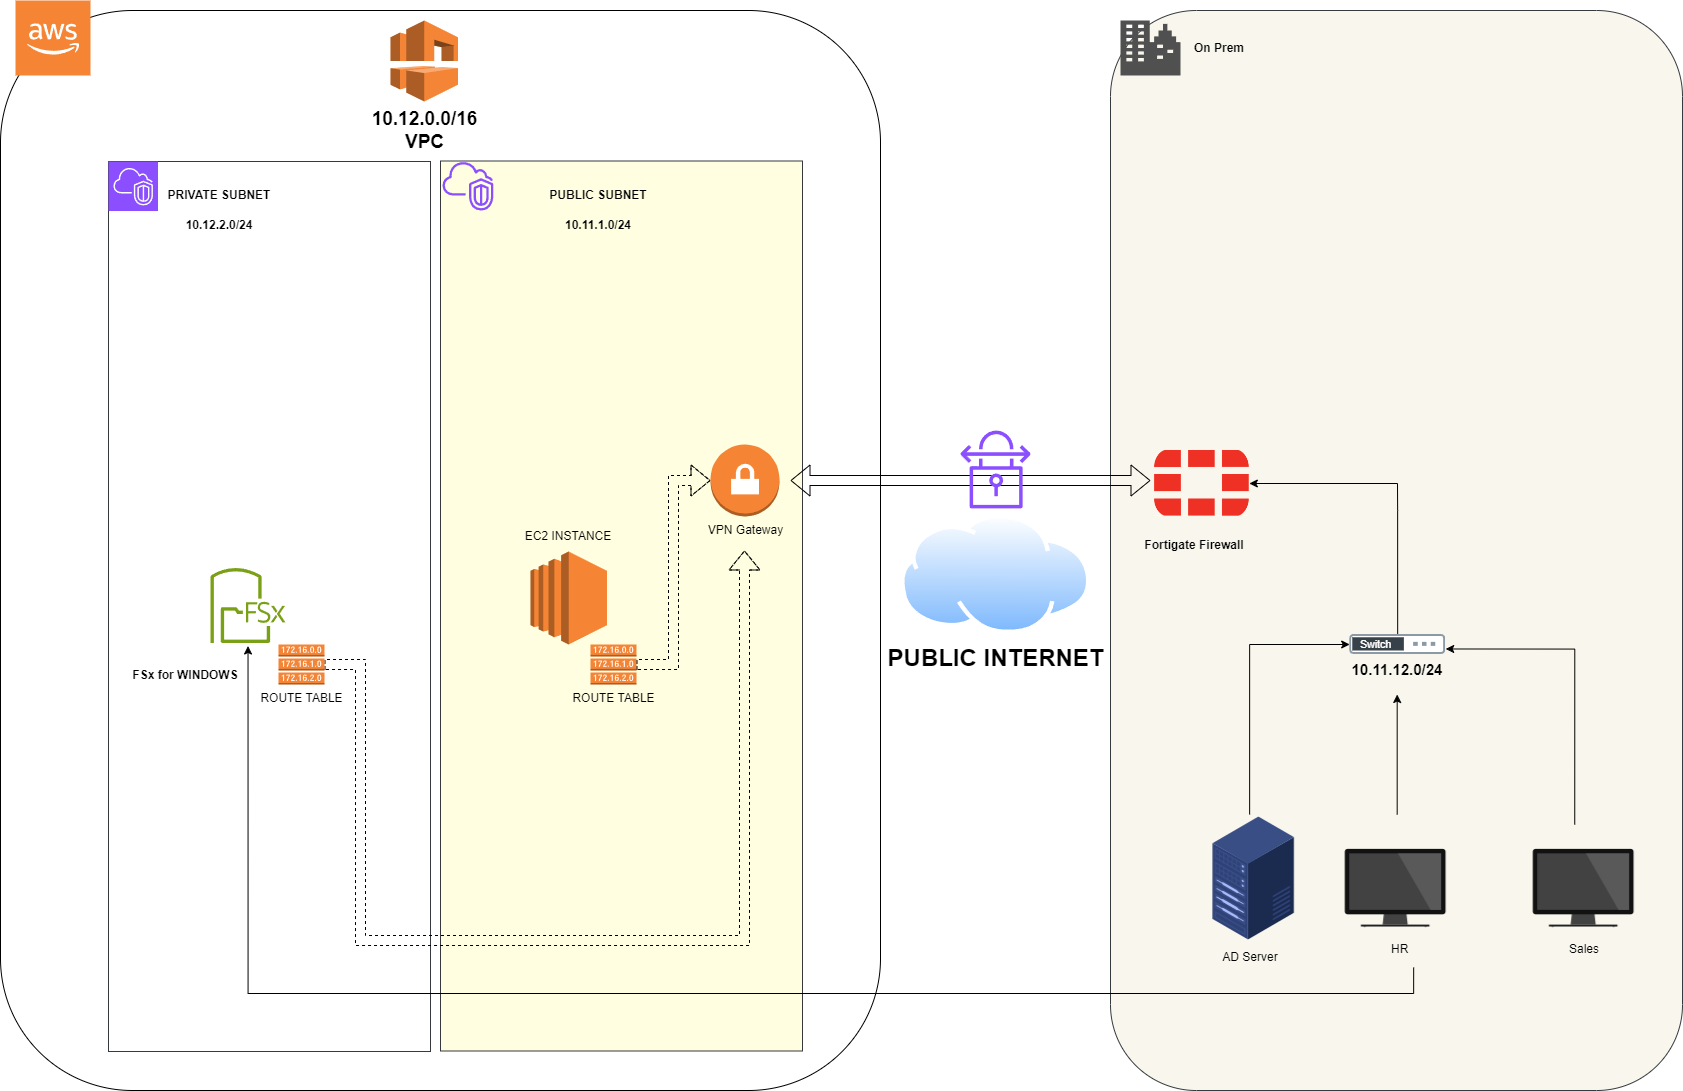
-
Create a Private Route Table
- Name:
Private-RT - Attached to the Private Subnet
- Destination:
10.11.12.0/24 - Target:
AWS-VPG
- Name:
-
Create the FSx for Windows file system
- Name:
AWS-FileSystem - Deployment type:
Multi-AZ - Storage:
32GB - VPC:
AWS-VPC(custom VPC) - Preferred subnet:
Private-Subnet - Standby subnet:
Public-Subnet - Windows Auth:
Self-managed AD - Fill out the information using the On-Prem AD data.
- Name:
-
Update the security group.
- Type:
Custom TCP - Port:
445 - Source:
10.11.12.0/24
- Type:
-
Attach the file system
- Copy the instruction given and execute it on the AD server.
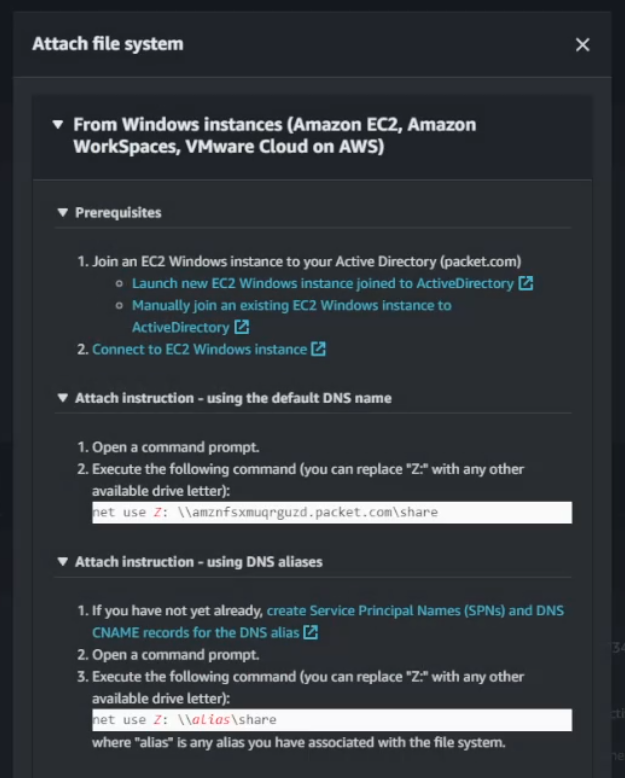
- Once the file system is attached, create a test document inside it.
- Map the file system to a workstation and confirm that the shared drive is working.
- Copy the instruction given and execute it on the AD server.